Google Drive File Up-loader using OAuth2
This article explains how to create an application that can be used to upload files to google drive using OAuth2 authorization framework and Google Drive API.
The application could be found at this GitHub repository.
Flow of the application
When you navigate to the application homepage, you will be greeted with the following page. As you can see there is an option to login with your google account.

Clicking on the link will redirect you to the authorization page at google where you would authorize the application Demo-OAuth to access your google drive. If you have multiple google accounts linked in your browser you might get a prompt like below to choose the account you want to use.
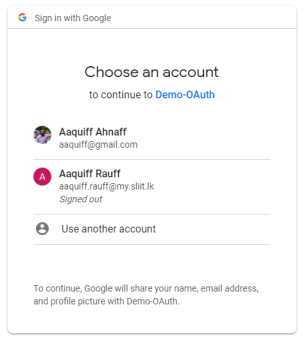
Once you choose an account you will be prompted with a screen to authorize Demo-OAuth application to access your google drive account.
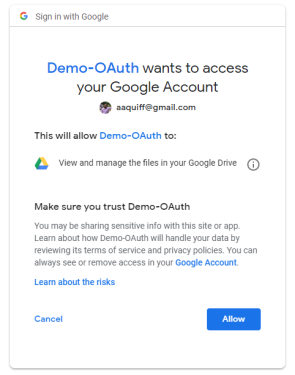
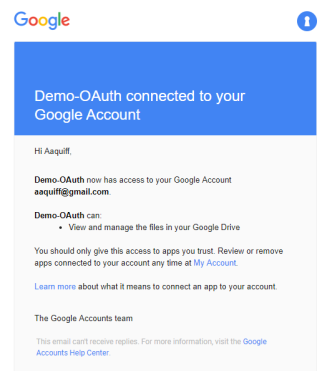
After you have carefully read about what this authorization will allow the app (or not), click allow to authorize the app. After doing so you will receive an email that notifies you that the app has been authorized. Your browser will also be redirected back to the application home page and you will be logged in with your google account. Your username will appear along with an option to log out.
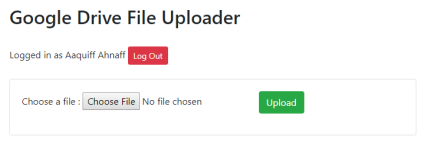
Click on the choose file button and select the file you want to upload to google drive.

The file chosen will be uploaded to Google Drive.
Implementation
The following sequence diagram sums up all the flows that happen during the authorization and file upload steps.
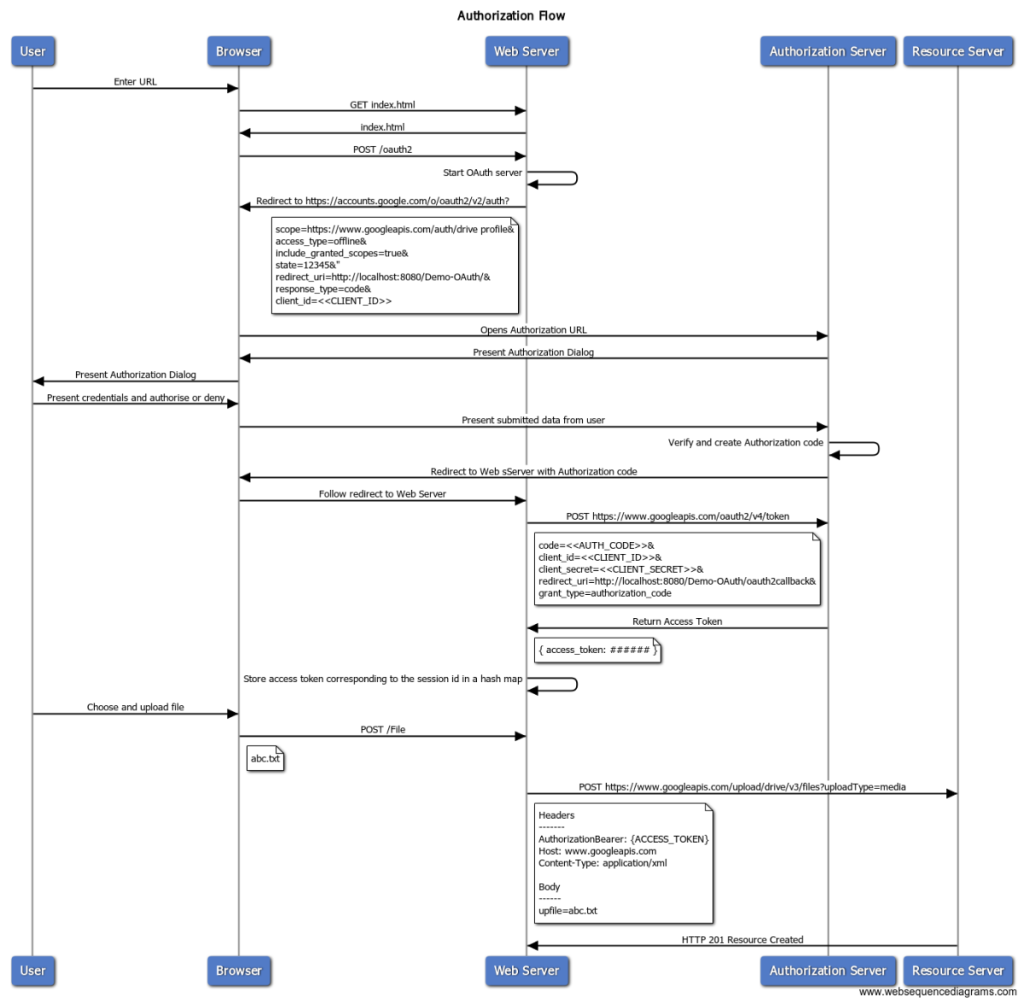
User requests the index.html bu navigating to the root of the application. He is presented with the UI and chooses to login with google. The web browser then posts to the /oauth2 endpoint which redirects the user to the google authorization flow appending the following information.
- scope – What do you want to authorize? In this case it is Google Drive and the Users Profile https://www.googleapis.com/auth/drive
- profile
- access_type – setting this to offline allows the resource to be accessed when the user is offline.
- state – Random value
- redirect_url – URL to redirect the user after the authorization flow
- response_type – code, means that the authorization code will be used as the mechanism.
- client_id – ID that is given when registering the application with Google Developer portal.
Google Authorization flow will authorize the user and then return the authentication code to the /oauth2callback servlet. The callback will then send the code received to the token endpoint of the authorization server along with some information like,
- code
- client_id
- client_secret
- redirect_url
- grant_type – code : use authentication code mechanism
The token endpoint will return a token that could be used to access the resources of the user. The web server will then store this token against the SESSIONID of the user in a hash map.
Now the user is Authorized.
When the user selects a file and uploads it, it is sent to the server and the server will post this file to the Google Drive API resource server along with the token. The token is included as a header as follows.
Authorization : Bearer {«TOKEN»}
The Google Drive API will return a status code of 201 to indicate that the resource is created.